You can believe the hype about the iPhone 18 Pro camera. After extensive testing, I can confirm without a doubt that it’s the best camera Apple has ever put in a smartphone.
Sure, I think some of its features are a little overrated: Variable aperture is situationally useful but not a game-changer, and Reference Image is too esoteric for most casual snappers. But I’m blown away by Apple’s arguably undersung analog-inspired Styles filters—I’ve never used a digital camera that mimics film so well, and that includes the Film Simulation-powered Fuji X100VI.
Whether you’re considering an upgrade or simply curious if the new glass and processing live up to the promise, here is a deep dive into how every new feature, sensor, and control performs in the real world.

Is the iPhone 18 Pro Camera Upgrade Worth It?
Hardware: A Brighter Main Lens Improves the Triple Rear Camera System
Before I get started, note that, as in past years, the iPhone 18 Pro is available in two sizes. The standard iPhone 18 Pro has a 6.3-inch screen, and the iPhone 18 Pro Max comes in at 6.9 inches. There are a couple of technical differences inside; for instance, the Pro Max uses a different modem type and has a longer-lasting battery than the Pro, but the camera and performance are identical between the two. I used the 18 Pro Max for testing and the images you see in this article.
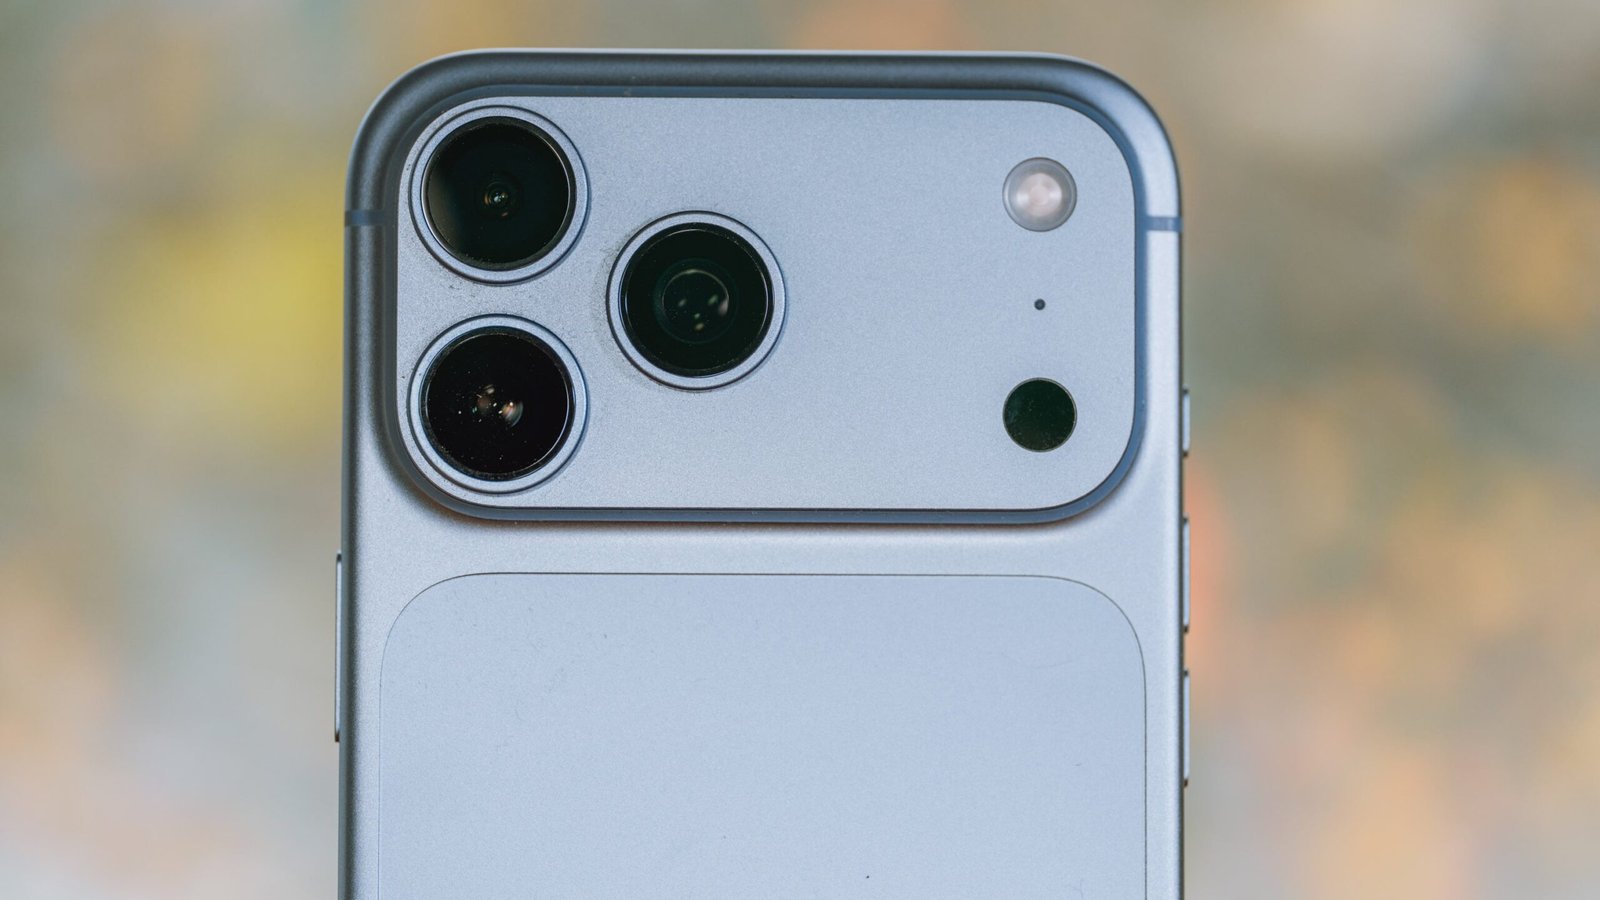
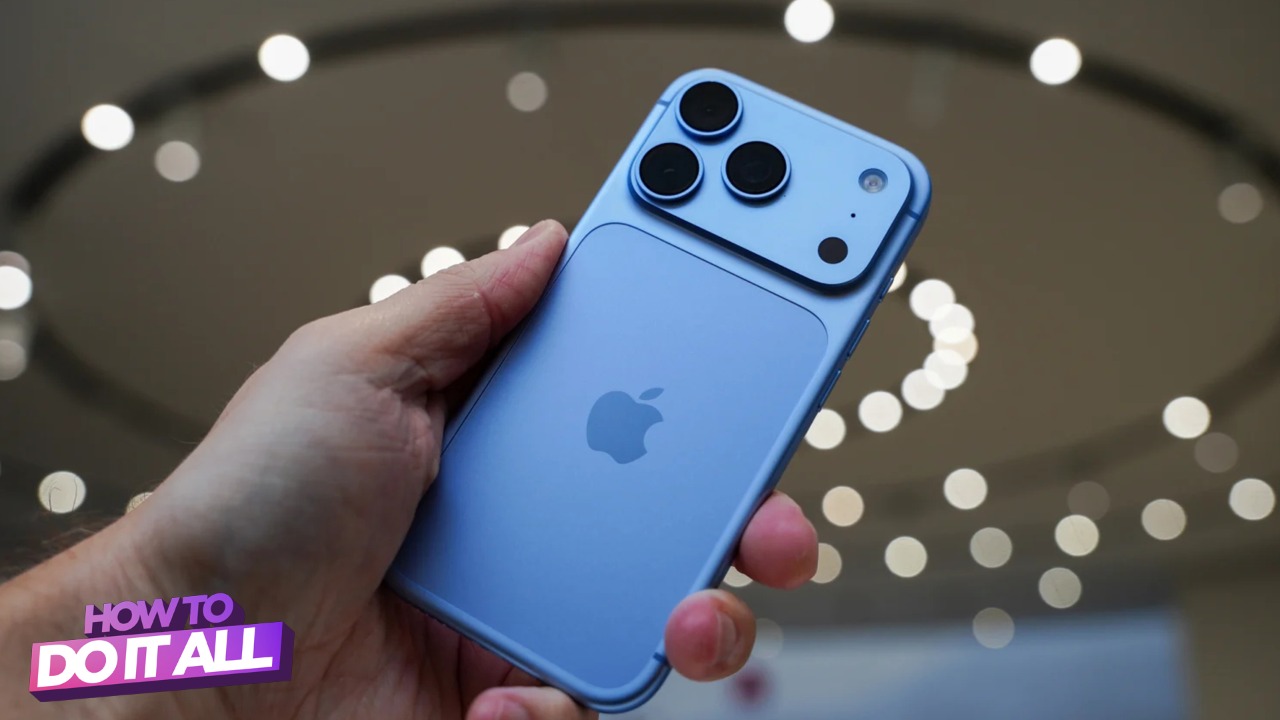
Like iPhone Pro models dating back to the 11 Pro, the iPhone 18 Pro has a triple-camera arrangement on the rear, plus a front camera for selfies and video chats. The system has evolved over time, and while the 18 Pro maintains the same mix of ultra-wide (13mm, 0.5x), wide-angle (24mm, 1x), and telephoto (100mm, 4x) lenses as the 17 Pro, the 18 Pro’s primary 1x camera gets a new lens this year. The 18 Pro’s 24mm f/1.48 lens is about 50% brighter than the 17 Pro’s 24mm f/1.78, plus it adds an aperture to support f/1.8, f/2.8, and f/4.

From left to right, the same scene captured with the 13mm, 24mm, and 100mm lenses (Credit: Jim Fisher)
The 13mm (0.5x) lens is familiar if you’ve used any recent iPhone; it’s been on standard and Pro models since the iPhone 11 and is handy to have onboard for architecture, interiors, and other scenes where the main lens is a little too claustrophobic. It’s one of the features that makes the iPhone a more capable pocket camera than a dedicated compact. Premium options like the perpetually sold-out Canon PowerShot G7 X Mark III start at 24mm, and even specialty vlogging cameras like the Insta360 Luna Ultra start at 20mm. The iPhone 18 Pro captures an appreciably wider view than both.
The front selfie camera can take images with sharp backgrounds (left) or a portrait bokeh effect (right) (Credit: Jim Fisher)
Going in the other direction, the 4x (100mm) telephoto comes in handy when you want to isolate a subject from the background for a portrait or get a closer view of a scene. The 100mm lens isn’t the longest that Apple has ever put in a phone; it used a 5x (120mm) lens in the 15 and 16 Pro, which could be a little too tight for interiors. The 4x lens is a good compromise; it’s great for portraits and catching images of kids or pets at play. It falls short if you’re trying to get photos of animals in the wild or field sports from the stands, but that’s true of the vast majority of smartphone camera systems.
Aperture Control: Useful, But Short of Revolutionary
Apple is making a big deal about the aperture; it’s a new feature, after all. It’s not as big a deal as you may think, though, and for casual snaps, I’m of the opinion that it’s best to let the phone do the driving and pick an f-stop automatically. The Camera app defaults to f/1.8 in most lighting conditions, capturing images with tack-sharp detail and adding a bit of background blur for portraits and close-ups, and it opens up to f/1.48 in dim light. There is a slight difference in detail at different f-stops. Take a look at the following pixel-level crops from the center of a 48MP image below (view the image in a new window or download it to see it at full size), and you’ll note that the texture is just slightly softer at f/1.48 and f/4.0 than it is at f1/.8 and f/2.8.
The difference in sharpness at each f-stop is subtle enough that you need to view an image at full resolution to tell them apart, but close examination shows the lens is ideally sharp at f/1.8 and f/2.8, and a teensy bit softer at f/1.48 and f/4.0 (Credit: Jim Fisher)
Manual aperture control is available for experts. It’s worthwhile to use f/2.8 to get a clearer background behind a subject in close-up situations. At f/4.0, you’ll be able to capture images that render bright points of light as four-point sunstars. These are created because the small aperture scatters light particles as they pass through the lens to the sensor, which is also why textures are a smidgen softer at f/4.0 compared with f/1.8 and f/2.8.
You won’t see it in every photo, but if you put a subject close to the lens the background is softer at f/1.48 than it is at narrower apertures (Credit: Jim Fisher)
You can also close down the aperture to get longer exposures for scenes that blur motion. For landscapes, you can use long exposures to smooth out running water, and if you’re more of an urban photographer, you can use it to blur pedestrians or moving vehicles while rendering buildings and objects in sharp focus. But even at f/4.0, the iPhone is limited in how much light it can cut out—for instance, on a sunny day, you’re looking at 1/60-second as the longest exposure you can take without overexposing an image. That’s simply not enough to blur moving subjects. You’ll have more freedom to take longer exposures in shade, twilight, or for nighttime cityscapes.
In bright light the longest shutter speed I can manage at f/4 without overexposing is 1/60-second; that’s not long enough to smooth out the flowing water in this scene (Credit: Jim Fisher)
I’m somewhat surprised, and a little disappointed, that Apple hasn’t yet rolled out a computational feature to make long daytime exposures feasible. Standalone cameras from OM System include a computational tool called Live ND that stacks multiple short exposures for long exposures that would normally require a physical filter over the lens. If you want to take these types of images with the iPhone 18 Pro, you’ll want to add a neutral density filter, an accessory that uses darkened glass to reduce the amount of light reaching the sensor. This isn’t a huge hurdle because there are plenty of ND filters available for the iPhone from trusted brands like Moment. Even so, you’ll have to make an effort to buy one and attach it to your phone. A computational long exposure feature would be more convenient, so hopefully Apple is working on one.
48MP Quad Bayer Sensors and Fusion Capture: The Math Behind the Zoom
Do you need to get in tighter? Apple backs each lens with a Quad Bayer 48MP sensor, which sounds like overkill for a smartphone system, but it adds a great trick: digital zoom that reduces the maximum pixel count without sacrificing picture quality. The Quad Bayer system lets you choose among using every pixel for 48MP (at 8-bit JPG, 10-bit HEIF, or 12-bit ProRaw DNG quality), cutting resolution to 12MP for smaller file sizes and improved low-light noise control (in the same formats), or using Apple’s Fusion system.
I used the 0.5x (13mm) lens and Ethereal Style for this image of a large, characterful tree (Credit: Jim Fisher)
Fusion photos combine one 48MP and one 12MP exposure into a 24MP photo, balancing detail, file size, and low-light performance. I think most creators and everyday iPhone users will want to use the Fusion setting. There’s only one big downside, at least for pros and shutterbugs: Fusion only works for JPG or HEIF formats, and is not available with ProRaw. And there’s not much trade-off: You get smaller file sizes, and 24MP is still plenty for social media and decently sized prints.
I used the 4x zoom and Quiet+Film style to capture this autumn gourd display (Credit: Jim Fisher)
One note: Regardless of whether you use 24MP or 48MP, the cameras will drop to a lower resolution at certain levels of digital zoom. The 24MP Fusion snaps dip to 12MP from 2x to 3.9x, and from 8x to 40x, and 48MP snaps scale down as soon as you start to zoom in between the focal lengths of the three prime lenses—for example, a 1.2x (28mm) snap comes in at 35MP, and a 1.5x (35mm) is 24MP. It’s not something that really matters, but if you’re scratching your head as to why some photos have fewer pixels than others, there’s your answer (you can check the pixel count, focal length, and other metadata by tapping the encircled lowercase “i” icon in the Photos app).
I used the 2x digital zoom to capture this scene (Credit: Jim Fisher)
Despite changes in pixel count, I consider the digital zoom lossless up to around 8x (200mm). Photos snapped at 8x look great on the screen, without any apparent loss of clarity. You’ll notice a drop off in fidelity at longer focal lengths. The iPhone 18 Pro supports up to 40x (1,000mm) digital zoom, but at that point, it’s magnifying such a small area of the image that the results are more like impressionist paintings than photos. It’s also tricky to hold the phone steady when you reach the extreme of the digital zoom, as the narrow angle magnifies the effects of shaking hands.
The iPhone doesn’t have on-device upscaling, but if you want to get more detail from its digital zoom you can always send a photo to a generative AI engine like ChatGPT (Credit: Jim Fisher/Open AI/PCMag)
Other brands deliver sharper, clearer results when pushing digital zoom to its extreme, but use generative AI to get there, a road that Apple has chosen not to go down. You can snap a clearer picture of the moon or a backyard critter with the Google Pixel 11 Pro or Samsung Galaxy S26 Ultra, since both use AI to add detail that the lens cannot see. But at best, these phones make good guesses, and at worst, hallucinate reality. If you want to upscale an iPhone photo with AI, you can always run an image through ChatGPT or another service.
Camera App: Packed With Pro Features, But a Bit Overcrowded
The built-in Camera app supports several capture modes for pictures (I’ll get into video further down the page): Photos, Reference, Portrait, Spatial, and Pano. If that sounds like a lot of options, it’s because it is—the iPhone does a lot. Apple goes a little overboard with the segmentation. Portrait and Spatial images are both available from within the main Photos tab, so it seems weird that they have their own tabs in the interface.
I used the 13mm lens and Quiet+Film Style for this image (Credit: Jim Fisher)
The sections may be segmented, but the interface is thankfully consistent across the different modes. The app shows a view from the active lens at the center of the screen. When holding the phone vertically, touch controls appear above and below the image and shift to the sides when you rotate the camera to landscape. To keep things consistent, I’m going to refer to the controls as you see them when holding the phone vertically.
I grabbed images of this wall fountain from a few different angles, including one that shows the sunstar effect (Credit: Jim Fisher)
The bottom panel includes a large, circular touch shutter at the center. A flexible touch icon is to its left; it switches between a script-font “f” and a flower icon depending on the scene. The “f” enables Portrait mode, the long-running setting that uses depth mapping to blur backgrounds. The flower is for Macro mode, which the phone automatically switches to when you get within a few inches of a subject.
The iPhone automatically changes over to its macro-capable 13mm lens when you get close to a subject, and shows a flower icon in the camera app to alert you of the change (Credit: Jim Fisher)
There’s a six-dot icon to the right of the shutter; you can tap it to open the manual Pro Controls menu, or swipe up from the bottom to open the same menu. There are more than a dozen options, including exposure control (Aperture, Exposure +/-, Flash, Shutter Speed, White Balance), computational features (Depth, Live, Night Mode), and others (Aspect, Format, Focus, Histogram, Styles, Timer). If you find yourself using any of these frequently, you can add them to a quick access bar at the top of the screen. It’s a thoughtful, flexible system for creators who want more control than a one-button camera provides.
The familiar Camera app gets some upgrades, including configurable Pro Controls that you can access from a pop-up menu or add to the Camera app’s top bar (Credit: Apple/PCMag)
Some of the iPhone 18 Pro’s physical buttons also work in the Camera app. You can choose to map the Action button to open the app, plus both Volume buttons and the Camera Control work as shutter releases when pressed. Camera Control also serves as a touch-sensitive slider bar for EV (brightness), Depth (the amount of blur in Portrait mode), Zoom (either continuous or stepped between 0.5x, 1x, 2x, 4x, and 8x), Styles, and Tone.
I used the 13mm lens and the Quiet+Film style for this image (Credit: Jim Fisher)
I like the idea of the Camera Control button, but I think that Apple needs to do some more work to make it a useful control surface. I found myself using it most often to adjust EV, either to bring an exposure down for a moody look or to brighten a scene when photographing a subject against a backlight. On a standalone camera, I’d use a physical control dial to set EV, and the touch-sensitive Camera Control button is a decent enough substitute, at least in theory. In practice? It’s a little finicky to use; it’s too easy to overshoot, making a scene too bright or too dark. Making subtle adjustments with the Camera Control is tough.
Quiet+Film pairs well with early morning light; I used it for this image shot with the 24mm lens at f/1.48 and appreciate the softened background that the bright lens captures (Credit: Jim Fisher)
Apple also upgraded the iPhone’s autofocus system. As with previous models, you’ll still just tap on the screen to select a subject and focus on it. The 18 Pro adds a Focus Tracking feature. Just double-tap on an object, person, or pet, and the camera will lock onto it for focus, even if it (or the camera) moves. Focus Tracking works very well and is handy for taking photos of kids or pets at play, plus is very easy and intuitive to use. The phone shows a “Focus Tracking” banner when the feature is engaged. The banner includes an “X” icon to cancel tracking and return to the standard focus mode.
Special Capture Modes: Reference Image, Live, Night, Portrait, Spatial, and Pano Explained
The iPhone 18 Pro includes a new feature called Reference Image that saves an original, unalterable version of a photo along with one that you can edit. The idea is that third parties can check how much an image has been edited versus what the lens saw. It’s a great idea in concept since AI images are everywhere, and having proof that a camera captured a photo is good news if you catch a shot of a big news event, need to document an accident for insurance purposes, or simply want to enter a picture in a photo contest.
I used the Portrait feature to give this image the same shallow depth of field you’d get with a full-frame camera using an f/1.4 lens (Credit: Jim Fisher)
However, Reference Image comes with some big caveats: It only works with the primary lens, must be enabled in the Settings > Camera menu, and only embeds the digitally signed original image in photos taken from within the Reference tab. That’s limiting, as you can’t change between lenses, adjust the aspect ratio, or use Night Mode with Reference images. Those are enough hoops to jump through that everyday photographers aren’t likely to use the feature, as doing so really takes intent and forethought. It’s my hope that Apple adds Reference Image to every lens with the next iPhone and makes the feature work transparently.
Reference Image shows the image as the lens captured it, before processing. For this example I adjusted exposure, applied the Quiet+Film style, and used Clean Up to remove some background clutter
(Credit: Jim Fisher/Apple/PCMag)
Reference Image is a nascent feature, but the iPhone 18 Pro’s computational modes have been around for generations. Live mode takes a short video clip along with your image, Portrait adds background blur to snaps and lets you adjust the strength of the blur and lighting after capture, and Night Mode merges a series of short exposures into one image so you can get brighter, sharper pictures in dark rooms and on neon-lit city streets. Pano captures ultra-wide panoramas in-camera just by sweeping the phone from left to right.
The iPhone used Night Mode and an f/1.48 aperture for these images, both captured in a dark room lit only by a TV screen (Credit: JIm Fisher)
If you’re an infrequent upgrader, Spatial may be new to you, as it was introduced with the iPhone 16. Spatial photos use the same depth mapping that the phone uses for Portrait capture to add a modest perspective shift 3D effect. The photo shifts slightly as you tilt the screen during playback, similar to a lenticular print, and it includes a 3D effect if you’re one of the half-dozen people in the world who use a Vision Pro headset to browse your photo albums. Spatial effects are automatically captured when you take a photo, and you can view them by tapping the hexagonal icon that’s above or to the right of an image in the Photos app.
Spatial photos play back with a 3D effect, perspective shifts as you tilt your phone
(Credit: Jim Fisher)
The Spatial view crops into a photo to work, though. That’s where the Spatial tab comes in handy—it shows you the exact framing you’ll get for a Spatial image. It feels a little half-baked, as you can only take photos in landscape mode with the main lens in the dedicated Spatial mode, and you can’t use advanced features like Portrait or Night Mode in conjunction. That’s a weird flex on Apple’s part because a Spatial view is available for pictures captured from the Photo tab regardless of which lens or aspect ratio you used, including those shot in Night Mode or with Portrait effects applied.
Styles: The Secret Sauce That Makes iPhone Snaps Stand Out
Apple introduced Styles way back in the iPhone 13 and has built on the feature with each subsequent generation. Styles are essentially filters designed to give your photos a signature look without editing, a trend that’s not just in phones, but also in standalone cameras. I think Apple may have cracked the secret recipe for achieving real analog film effects with the iPhone 18 Pro, beating stalwart brands like Fujifilm and Nikon. The 18 Pro brings the biggest upgrade to Styles since its introduction, with additional effects that mimic film grain and halation, plus soft skin and glow filters for creators chasing a more modern look.
This scene really shows off the difference of an image without texture applied (left) and one with the Film texture and halation effects (right); both versions of the photo use the Natural style (Credit: Jim Fisher)
The iPhone 18 Pro asks you to choose a style when you set up the phone from a list of seven options (Amber, Bright, Cool Rose, Gold, Neutral, Rose Gold, Standard). Choosing a Style here doesn’t lock you in—the Camera app has another nine options (Cozy, Dramatic, Ethereal, Luminous, Muted B&W, Natural, Quiet, Stark B&W, Vibrant), and you can freely choose between any of them. Additionally, you choose any texture effect (Film, Glow, Soft Skin) for any Style, or turn the texture effect off. Texture effects come with a slider adjustment so you can dial in their intensity, and you can choose whether or not to add grain to Film looks. Even better, you’re not locked into a Style once you’ve taken a photo—the iPhone lets you freely edit the image and try out different Styles in its Photos app.
Styles can change the color, tones, and texture of an image; for this scene I shot the image with Quiet+Film (left), and changed it to Amber+Glow (center) and Dramatic+Film (right) in the Photos app (Credit: Jim Fisher)
Each named effect captures photos with a different color tone—pick Standard, Natural, or Neutral for a faithful rendering; Cool for bluer tones; or Amber or Rose for a warmer finish. Options like Ethereal and Luminous render images with brighter tones and open shadows, and Dramatic and Stark crunch the black levels and ramp up contrast.
These photos felt like something out of Terrence Malick’s Days of Heaven, so I used the Quiet+Glow Style to give them a bright, surreal look (Credit: Jim Fisher)
The Soft Skin effect smooths out wrinkles and blemishes, a good choice for portraits and social media posts where you want to look like you spent some time applying concealer before your photo shoot. Glow accentuates flare and pumps up the luminance of brighter parts of an image. Film gives images an analog look and adds halation effects, a type of flare that shows up as an orangish halo around bright points of light, it’s most noticeable in areas of high contrast like sunlight peeking through leaves. There’s also a film grain effect you can use alongside any of the other effects, or turn it off if you prefer a clean, digital look.
The Dramatic+Film Style gives this scene a contrasty, saturated look that reminds me of slide film (Credit: Jim Fisher)
I tried a bunch of different Styles and found that Quiet+Film with grain enabled best suits my vibe. It renders colors warmly, with some punch, and really shows off the halation effect—it’s the closest I’ve seen any digital camera get to the look of Kodak Gold, which was the dominant consumer film stock of my youth. For black and white, I love the Stark look for contrasty scenes, and tweaked the settings of Muted B&W+Glow for lower light and other settings where I wanted to lift shadow detail—I got the best results when I turned off its Glow effect in favor of the Film look and turned grain on.
Some things look better in black and white; I used the Stark B&W+Film Style for these images (Credit: Jim Fisher)
But that’s just me—you may hate the rough, imperfect look of the Film effects and prefer to shoot everything with a Soft Skin or Glow effect, or simply turn off the effects and just use Styles to change color tones. The beauty of Styles is that they’re entirely configurable to taste, so you can find a recipe that matches your eye and preferred editing style. And since you can freely change Styles and edit images after capture, you’re free to experiment with different effects and color tones to find the look that best matches your tastes. To me, the improvements to Styles are the reason to step up from the iPhone 17 Pro’s camera, and make the 18 Pro the best choice for photographers who’ve gone a few years since an upgrade.
These images were all captured with the main lens and Quiet+Film Style (Credit: Jim Fisher)
Styles are available exclusively for JPG and HEIF photos—they don’t work with ProRaw. If you want to get film looks from Raw images, you’ll want to edit your snaps with a mobile app like VSCO or a desktop preset pack like the RNI All Films 5 Pro for Lightroom Classic. When I use a dedicated camera, I almost always use Raw capture because of the editing flexibility the format provides, but the iPhone’s HEIF format and image editing tools deliver a similar level of malleability, and having access to Styles is enough to convince me that, for most people and use cases, HEIF makes more sense. That said, I wouldn’t mind at all if Apple added a paired Raw+HEIF capture option to its Camera app. Third-party camera apps like Adobe Project Indigo support paired capture, so it’s not beyond the phone’s technical capabilities, especially when you factor in the power of its A20 processor.
Recommended by Our Editors
I used Clean Up to remove the oscillating fan from the background of this image (Credit: Jim Fisher)
You don’t have to use ProRaw to edit photos, though. The 10-bit HEIF format offers plenty of leeway for changes to exposure, white balance, contrast, saturation, and so on. The Photos app has a full suite of editing tools that make it easy to tweak a picture that didn’t come out quite right, plus it includes a few Generative AI tools, all of which run on the device. You can use Clean Up to remove distracting objects (I took out the oscillating fan from the background of the preceding image of my cat, Aubergine), Extend to get a wider shot than the lens captured, and Reframe to shift the perspective of an image for a more flattering portrait. It’s up to you as to which, if any, of these tools you find ethically acceptable to use. I tend to lean into documentary style with my photography and avoid using generative AI, but I won’t fault others who embrace it.
For video, the iPhone records at up to 4K60 with any of its lenses, and can go down to 24fps if you want a cinematic cadence. The main lens supports higher frame rates, up to 4K120 and 1080p240, which are useful for slow motion. The other lenses top out at 60fps. The phone uses HEVC (H.265) compression by default, a popular choice for consumer cameras thanks to its balance of picture quality, file sizes, and broad support for editing and playback.
Standard 4K24 HDR video
(Credit: Jim Fisher)
Experts can choose to switch to ProRes, a format that records more color data and doesn’t compress footage as aggressively as HEVC. On the iPhone 18 Pro, go to Settings > Camera and partition off some storage if you want to record ProRes to internal memory; it’s a quick and painless process. The iPhone lets you save ProRes video at up to 4K30 to internal storage; you’ll need to use an external USB-C SSD for higher frame rates. ProRes recording is available with HDR, Apple Log, or Apple Log2 color only.
You need to set up a dedicated partition to record ProRes video internally, but thankfully it’s easy to do and reversible (Credit: Apple/PCMag)
Professionals will appreciate ProRes for its superior color sampling to HEVC, and will want to use a Log profile to coax the most pleasing footage out of the iPhone. Log provides a neutral starting point for color correction and bypasses the sharpening and other processing tricks baked into Apple’s other ready-to-share color profiles. The iPhone Camera app requires you to use ProRes for Log, but it’s not the only option. If you switch to Apple’s Final Cut Camera recording app (a free download), you’ll unlock additional recording options, including HEVC with Log color and every level of ProRes (LT, 422, HQ, Raw, and Raw HQ).
Video Modes: 4K Recording Plus Cinematic, Slo-Mo, and Time-Lapse Modes
The Camera app has four video tabs: Cinematic, Slo-Mo, Time-Lapse, and Video. Controls are laid out similarly to Photo mode, with the record button, lens selection, and Pro Controls menus at the bottom (or the side if you’re recording in widescreen), and the customizable Pro Controls quick access menu at the top (or the opposite side). Most of the modes are self-explanatory: Slo-Mo uses the main lens to record at 4K120 or 1080p120, so you can slow the footage down to 24 or 30fps playback and still get smooth motion. Time-Lapse takes a series of images and combines them into a 4K video that compresses time; it works with any lens. Video, well, it records movies at up to 4K60 with any lens, and also lets you record 4K120 with the main lens without slow-motion effects applied (you can slow high frame rate footage down when editing video on the phone or on your laptop if you’d like).
4K120 HDR Slo-Mo played back at 30fps
(Credit: Jim Fisher)
Cinematic takes a little explaining. It uses the iPhone’s depth-mapping tools to add a shallow-depth-of-field effect to movies, similar to what the phone does in Portrait mode for stills. The effect doesn’t work well with every scene, and is only available with the main lens, but if you’re a fan of the shallow focus effects that you see in movies like Army of the Dead or TV shows like House of the Dragon, it’s worth checking out. The iPhone 18 Pro is the first device to let you record in Cinematic mode and turn the effect on or off when editing, so there’s no drawback to giving it a try.
Comparison showing all built-in video filters
(Credit: Jim Fisher)
Styles aren’t available for movies, but the iPhone has Filters that let you change the look of footage in the Photos editing app. You can switch between a natural look (Original), three saturated finishes (Vivid, Vivid Cool, Vivid Warm), high-contrast profiles (Dramatic, Dramatic Cool, Dramatic Warm), or three black-and-white filters (Mono, Silvertone, Noir). If you want more control over color and tone, you can use a Log or Log2 profile, either in the Camera app or in Final Cut Camera.
What’s Still Missing: Ergonomics, Long Exposure, and Xenon Dreams
I’m used to carrying big, interchangeable-lens cameras every day, and there are things I miss about using a real camera when I grab a phone instead. Ergonomics is the big sticking point for me. The 18 Pro’s buttons are good enough substitutes for a shutter release, but I truly missed having a proper control wheel for exposure adjustment. The Camera Control Button just doesn’t work for me.
I used the 4x (100mm) lens to flatten the perspective of this photo, captured with the Amber+Film Style (Credit: Jim Fisher)
Likewise, I find it difficult to hold a phone perfectly level and perpendicular to a subject. Even with the help of an on-screen grid, it’s challenging to line up architectural shots and get properly straight, level lines. The phone is super-light and far thinner than a camera, so it’s too easy to hold it a little off-kilter. There is a cottage industry of add-on grips for the iPhone, and I plan on looking at some of those options to see if they’re enough to overcome this hurdle.
I like the punchy, surreal colors that the Dramatic+Film Style gives this photo (Credit: Jim Fisher)
I think Apple should add a long-exposure mode, especially now that it has introduced a variable aperture. OM System has a computational ND filter effect that works very well in its standalone cameras, and I’d love to see the iPhone add something similar. The variable aperture is a nice addition, but as it stands, you still need to use ND filters to get seconds-long exposures in daylight.
The Stark B&W+Film Style works well for this photo, captured with the 24mm (1x) lens (Credit: Jim Fisher)
And this is a pipe dream, but a Xenon flash would be a great addition, especially since the direct flash look is back in vogue to the point where vintage digital point-and-shoots like the Fujifilm X20 are hot-ticket items with young creators. A Xenon flash freezes motion in ways that the iPhone’s LED light simply can’t, but it relies on capacitors that are a little too large to fit into most smartphones. Apple is all about incredibly thin hardware, but maybe there’s room for one of Cupertino’s engineers to whip up an add-on case with a proper grip, flash, filter mount, and control dial.
I did my best to keep the phone level, parallel, perpindicular, and parallel for this scene; architectural images can be a struggle to get with any smartphone camera, even with the aid of grid lines and an on-screen bubble level (Credit: Jim Fisher)
I don’t have gripes about the iPhone 18 Pro’s sensors and lenses: They deliver great results, but they no longer qualify as bleeding-edge. Looking ahead, I think Apple would be wise to consider moving to a Lofic image sensor. Lofic chips are a relatively new concept; they’re able to preserve more highlight and shadow detail than most sensors because they have two “buckets” for light to go into—the brightest parts of a scene go into a virtual overflow container instead of clipping into nothing as they would with a basic BSI CMOS sensor.
I’m a sucker for birds of paradise; I shot this one with the main lens and the Quiet+Film Style (Credit: Jim Fisher)
We’ve seen Lofic in a few consumer devices this year, the Leica Leitzphone, the Xiaomi 17 Ultra, and the DJI Osmo Pocket 4P, all of which have a real leg up over competitors for dynamic range. They approach 17 stops for Log video, a figure we’ve only seen on the highest-end cinema cameras previously. It’s my hope that Lofic sensors come to more devices and get to the iPhone sooner rather than later.
Verdict: Should You Buy the iPhone 18 Pro for the Camera?
The decision to buy the iPhone 18 Pro ultimately comes down to two factors: what phone is currently in your pocket, and how much you value Apple’s software rendering over pure hardware specs.
If you have a 17 Pro, you can comfortably sit this generation out. The brighter main lens and variable aperture are welcome additions for extreme edge cases, but they don’t radically transform day-to-day snapshots. The one major exception is if you are deeply invested in street or documentary photography—in that case, the new Film, Glow, and Soft Skin Styles might just justify a trade-in.
On the other hand, if you’re upgrading from an iPhone 13 or older—as a massive portion of users currently are—the jump in performance is staggering. You aren’t just gaining a faster sensor; you’re stepping into a completely different era of smartphone photography defined by 48MP Quad Bayer resolution, Lossless Fusion zoom, and far superior dynamic range. Both family photographers and shutterbugs who use an iPhone as their primary camera will enjoy a vastly upgraded experience with the 18 Pro.
Ultimately, the iPhone 18 Pro may still lack the tactile ergonomics of a dedicated camera body, but as an always-in-your-pocket shooter, it sets a new high mark.
About Our Expert

Jim Fisher
Principal Writer, Cameras
Experience
Images, and the devices that capture them, are my focus. I’ve covered cameras at PCMag for the past 15 years, which has given me a front row seat for the changeover from DSLRs to mirrorless cameras, the smartphone camera revolution, and the emergence of drones for aerial imaging. I have extensive experience with every major mirrorless and SLR system, and am also comfortable using point-and-shoot and action cameras. As a Part 107 Certified drone pilot, I’m licensed to fly unmanned aircraft systems (UAS) for commercial and editorial purposes, and am knowledgeable about federal rules and regulations regarding drones.
Read Full Bio